Strakes for the eel drifter

The strakes for the eel drifter are made of oak. However, it was also normal to use pine or larch.

Click on the photos to enlarge them...
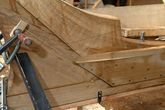
 

The boat we built should have almost the same form as the older eel drifters. The old boat is both beautiful and sails well, so we built the new boat based on the measurements of an old eel drifter.


In this way, we could be sure that the lines and shape of the hull had their basis in those of the old boat, so that the lessons learned previously could be passed on with the new eel drifter.

Here, a mould for one of the frames is almost finished, and its thickness is checked.

Simon installs the second-last mould in the aft.

The eel drifter is clinker-built (planks overlapping each other) and not carvel-built (planks on top of each other), as can be seen on the mould. The mould's form shows the line that follows the inner edge of the clinker-built strakes.

The first strake in the aft is in place

The moulds are well supported with timbers, so that they won't move when the strakes are set fast against them. 

View from the aft.

Each mould is marked with a line and a number from 1 to 12. The line shows there the upper edge of each strake should fit.

Front view, with the third strake.

Hanus carves out the rabbet on the port side, while Erik fits his plank on the starboard side.

The strakes must fit so well together, that they can be watertight without the use of glue or rubber. They are riveted together with copper nails.

On the old eel drifters, place was made to allow a thin cotton thread to be beaten into the space between the planks, from the outside. We also chose to do this, so that the boat would always be tight, even after a winter on land where the hull had dried out.
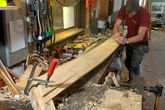
The upper edge of the fourth strake is prepared, so that the next strake can be attached.

The shape of the previous strake is marked off and transferred to the new strake. The upper edge is off-set using the marks from the mould. The best plank is chosen from the stock pile and cut into the correct shape using the band saw. 

Afterwards, the plank is planed to the correct thickness using a thickness planer.

The plank is planed by hand to remove the marks from the thickness planer. The the section where the planks will overlap is planed and prepared to take the next strake.

Afterwards, the plank has to be put into the steam chest. The plank is warmed up with steam, so that the wood can be bent into shape.

An old rule of thumb says that the wood must be steamed for 'an hour per inch'. The planks on the drifter are 22mm thick, and with our effective steam chest, the planks were pliable after just half an hour.

Just after the plank is taken out of the steam chest, it must be bent into the correct shape. It will remain in position until it is completely cool.

Afterwards, it is taken off and the last adjustments made, so that the strakes will be completely watertight.

All of the planks for the eel drifter have been through the steam chest. This is a necessity with such a rounded hull form.

It is not only important that the strakes must 'run evenly' - as in, they must not go up and down along their length - it is also vital that their ends are evenly spaced on the stem and stern. Any disharmony in dimensions can be clearly seen, when looking at the boat from fore and aft.

The planks are joined together. Butt blocks are used on the inner side of the strakes. They are also riveted in place with copper nails. 


Here you can see the finished shape of the drifter, characterised by an ample rounded stem and a rounded stern.

Finally, the rabbet is caulked with a cotton thread.